We always keep looking for some interesting waste items from which, we can develop something creative and unique. While searching for such waste items, our search paused at the toothpaste covers. Toothpaste covers are simply useless in our daily life. We bring the toothpaste wrapped in a cover, use the tube daily but throw the toothpaste cover the same day without knowing that this poor little thing has many uses!

If nothing else, then at least a decent recycled craft can be easily prepared using the toothpaste cover! Wondering how? You need to check out this amazing tutorial to make correct use of the toothpaste cover and prepare something unique out of it! Today we are going to make a beautiful jewellery box form the toothpaste cover!
Things You Need To Make A Beautiful Jewellery Box

- Printed paper
- Toothpaste boxes
- Colours
- Brushes
- Plastic wire
- Beads
- Glue gun
- Scissors
- Colour brush
- Cutter
- Pen and pencil
- Ruler
- Adhesive
- Packing tape
Steps To Make A Beautiful Best Out Of Waste Jewellery Box
Step 1- Take measurements of the 2 boxes

The toothpaste box is the base of this craft thus let’s starts with the toothpaste box. We will need 2 boxes one for the base and one of the compartments. Take first toothpaste box and do markings. Take the measurements on the sides and front of the box using the pen and ruler. These markings will be done to get a smooth opening of the box.
Take another box and make equal partitions. These markings will be used to make different compartments in the jewellery box thus, make 4-5 equal partitions depending on the length of the box.
Step 2- Cut the jewellery boxes

Once the marking is done, cut the first box using a cutter. Cut from the side and from the front of the box thus you get an easily open able box. Now, cut the other box using the cutter you will get 4 compartments out of the box. We will arrange these free compartments in the inner box later.
Step 3-Paint the compartments and box

We need to colour the main toothpaste box and thus, we will sue white colour. In a bowl, add some white colour and water. With a brush, apply white colour to the interior of the box. To give the jewellery box a unique look, we will paint the compartments with different shades. Thus, colour the compartments with different colours. Paint the interior and exteriors with red, yellow, green, blue and such bright shades.
Step 4- Prepare the printed paper

Once we get all the compartments painted, let them dry. It’s now time to cover the main toothpaste box with the printed paper. For this, take the printed paper and take the measurements of the box on the paper. Consider all the four sides along with left and right side of the paper. Mark the measurements on the paper and draw it using the pencil and ruler. Once done, run the cutter smoothly on the paper.
Don’t cut the paper as it will tear. Just run the cutter to make the bends and folds smoother. However, cut the left and right sides for sealing the box from sides.
Step 5- Stick the printed paper on the box

It’s now time to stick the printed paper to the box and make it look more decorative. Thus take some adhesive, add some water in the bowl and make it thin. Apply the adhesive on all the sides of the box. Paste the printed paper on the box thoroughly. Stick all the sides properly to the box and also stick the top and sides of the box.
Step 6- Give the box a finishing touch

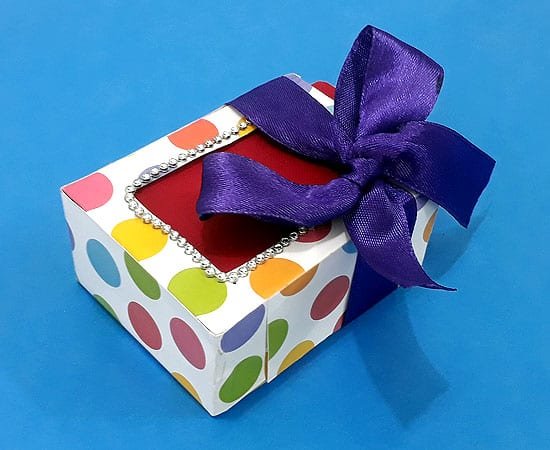
Let all the sides and let entire paper stick to the box carefully. Fox the different compartments or pieces in the jewellery box for an interesting look! For outer decoration, paste a bead on the front side of the box using adhesive. On the top of the box, stick the wire in a u shape. With this, you can easily open and close the jewellery box.
In the different compartments, place your jewellery like earrings, rings, chains, bracelets and make it a multipurpose jewellery box!

You can try this easy to make jewellery box craft and make jewellery storing easier! We understand how troublesome it is to store and not replace all the tiny earrings, rings, nose pins and such jewellery items. With the help of this wonderful multi-compartment jewellery box, managing jewellery will become super easy!
Try this wonderful recycled craft and share your experience with us!
Happy crafting!
Article Tags: Best out of waste · Jewellery Box · Multi-Compartment Jewellery Box · Recycled Craft · Toothpaste Cover Craft · Utility Craft