Quilling art is one such form of art that is fast catching pace in making a special place in the heart of all art and craft lovers. Quilled designs have an additional touch of dimension to it. The sheer versatility that quilled paper designs offer is wide and full of variety. Ranging from free designs to contemporary and modern versions of designs, quilling art encompasses a superfluity of designs.
The sheer simplicity of quilling art is the fact that does not need you to spend the endless amount of money to make some beautiful Quilling designs.
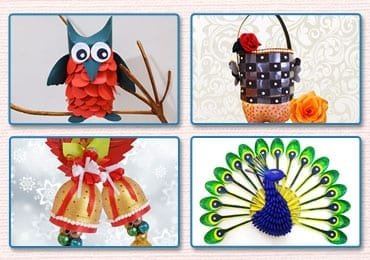
We at stylenrich.com make every effort to bring forth new and invent creative designs and ways to add to the beauty of your home decor. We have taken the initiative of making a beautiful and vibrant peacock feather using Quilling art.

How to Make a Vibrant Peacock Feather Using Paper Quilling Art…
Quilling paper art is one such form that requires a skilled hand and a steady and creative mind. Let your imagination run wild when it comes to the choice of designs and colors. And the final result is totally worth the hard work.
Let us see how to make a vibrant peacock feather using Paper Quilling.
Material Required for Peacock Feather Quilling Art


- A blank paper
- Adhesive
- Scissors
- A pencil
- Quilling Needle
- Silver Glitter
- Decorative pearl
- Quilling strips in colors of – Sap green, Turquoise Blue, Pink, Orange
Do you want to know how to make easy paper craft? Read Here…
Procedure for Making Peacock Feather Using Quilling Art
Step 1: Take a blank paper and draw an outline of the peacock feather.
Step 2: This will work as an extremely handy roadmap for you while pasting the Quilling strips.

Step 3: Begin by making a tight coil with the help of the quilling needle, and stick the end of it with adhesive.

Want to explore DIY Room Decor ideas using quilling art? Read more how to make awesome flower quilling wall hanging…
Step 4: Make tight coils in the colors of Blue, green and orange. Once the tight coils of these colors are ready, mould and shape them like that of a tear drop.

Step 5: Further in this quilling paper design, start pasting these tear drop shaped tight coils in the centre of the feather.

Step 6: Arrange and paste them on the basis of the design you have roughly sketched on the paper, keeping blue in the centre and surrounding it with Orange and Green respectively.

Do you want to learn How to Make Easy Paper Roses? You must read here…
Step 7: Follow this with shaping and moulding the blue color strip according to the curves of the feather. Again keeps the strip on the paper using the sketch as a guideline to help you know the curves and turns of the feather.
Step 8: Instead of pasting it in the usual flat way, paste the quilling strip vertically so as to give it a different look.

Step 9: Make a loose scroll in green color, and do not paste it in the end. Arrange it inside the blue strip, followed by the arrangement of the Pink strip.

How to Make Easy and Beautiful Spiral Flowers for Home Decoration! Read more for step by step instructions…
Step 10: Use your fingers and the quilling needle accordingly so as to make the quilling strip flexible for the curves of the feather.
Step 11: Add and vertically paste more colored quilling strips and work your way outwards in the formation and arrangement of the design.

Step 12: With the help of the quilling needle make soft coils towards the ends of the feather.
Let’s learn here – How to make Paper Floral Craft for Your Walls!
Step 13: Cut the remaining strips left after the covering the design.
Step 14: In the end give it the glam shine by adding glitter and a decorative pearl in the centre.


Isn’t the final result of Quilling paper art worth all the creativity you just invested in it? Quilling art in the form of a peacock feather is ready to gather compliments from everyone.
You have to give Quilling art a sure try to see the result for yourself. Quilled paper art is fast becoming a very popular form of art, that is being used by a lot of people adorn their homes as a part of home decor.
Did we inspire you? We would love to see the designs you create with quilling paper designs! Share your thoughts in the comment section below!
Article Tags: DIY Paper Crafts · DIY Room Decor · Home Decor · how to's · Paper Craft · Peacock Feather · Quilling Art · Wall decoration Ideas