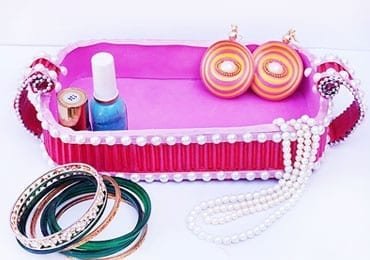
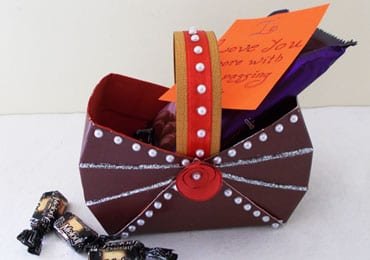
Baskets are simply a boon for us which helps us in arranging things. Wonder how many things in your home and in your room are misplaced and are tough to find! You can solve this problem by making some interesting and easy paper baskets at home. DIY crafts are always to your rescue when you don’t want to spend more bucks and need any multi-usable item. Today, we are going to make an easy paper basket DIY Craft which you can use to store multiple things. And reduce the mess in your room!

So let’s get started and make an interesting best out of waste craft with all the excitement!
Things You Will Need To Make A DIY Paper Basket

- Foam sheet
- Ruler
- Pencil
- Cutter
- Scissors
- Cardboard
- Glue gun
- Colours
- Brushes
- Satin ribbon
- Pearls
- Bead lace
Steps To Make A Paper Basket DIY Craft
Step 1: Make the base of the basket

Let’s start with making the basket base. We will use the thick cardboard to prepare the base. Thus, take measurements. Draw a width line of 8cm, make two 4.5 cm, sides and mark the corners of 1 inch as shown in the video. Also, draw a semi-circle in the corner boxes to give a bulging shape to the paper DIY basket. With the help of a cutter, cut the entire shape from the cardboard. You will get a bulging rectangle shape.
Step 2: Create the framing stripes

Now take another cardboard and take measurements. Draw 1.5 inch long strips and cut it with a cutter. On these stripes, draw a thin line on both the sides and run the cutter to make a thin cardboard bend. From the middle of these stripes, remove 1 layer of cardboard using a cutter. Refer the video to trim out the cardboard layer perfectly. This way, you will get a strip thin from middle and thick from the sides. Repeat this process for both the 1.5-inch strips.
Step 3: Frame the base with side cardboard stripes

The stripes which we prepared right way will be used for framing the sides of the basket. We made the cardboard stripes thin to let them fold easily. Now it’s time to stick the stripes to the base. Thus, apply some glue on the inner bottom of the stripes and stick it to the base. Cover the entire base with these stripes and you will get a perfectly shaped basket.
Don’t miss to read here How To Make Multicoloured Paper Peacock for Home Decor!
Step 4: Colour the basket sides

It’s now time to add some beautiful colors to this raw basket. To make it look more interesting and colorful, select your favorite shades. We have selected light and dark pink. Take the brush and start painting the sides of a basket with pink color. Colour all the 4 sides of the basket with pink and let it get dry.
Step 5: Make the corner handles

While your colour basket is getting dry, take another cardboard sheet and take measurements. Make 2 long strips with the width of around 3.5 inches and make these stripes thin using the previous method, take the cutter and remove 1 layer of the cardboard form the stripes which make it thin and foldable. We will use these stripes to make the corner handles.
Step 6: Colour the stripes

We need to now color both of the stripes with pink shade. Cover both the stripes with pink from both the sides and let it get dry. Once the stripes are dry, you need to decorate the stripes with satin pink ribbon. On the sides of these stripes, apply some glue and stick pin ribbon. Cut the remaining part with the scissors and glue the small ribbon in the backside of the stripes.
Step 7: Cover the base of basket

The basket is prepared using cardboard and thus, we will need to cover the inner part of the basket. For this, get a pink foam sheet and place the basket on the paper. Take a pencil and trace the basket on the sheet. Using a cutter trim the foam sheet and get the exact shape of the basket. Apply some glue in the base of the basket and stick the sheet in the basket. Let it get dry.
Step 8: Cover the sides of basket
We also need to cover the inner sides of the basket. Thus, apply the foam sheet on the sides using glue and cut the remaining sheet with a cutter. This way, you will get a stunning inner framing for the basket.
Let’s see the step by step tutorial on how to make an easy basket for chocolates!
Step 9: Decorate the basket

To make the basket look more decorative, you can use the same pink satin ribbon. Thus, apply some glue on the top of the basket and cover the entire top using the pink ribbon. This will give a svelte smooth look to your basket. You can also apply this ribbon on the sides of the base to make it look more extraordinary. Below the pink ribbon, stick the pearl lace using glue. Again in the bottom of the basket, apply glue and stick the pink ribbon. This will give a mesmerizing look to the basket!
Step 10: Assemble the holders

Now it’s time to assemble the holders. For this, take the strip we coloured and decorated with pink ribbon. Roll the strip half way and stick it on one side of the basket. Apply some glue and place the roll in the basket. Let it stick properly. Stick the remaining strip to the base of the basket using glue. Repeat the same process for another side. Here you get 2 sides and holders ready.
Step 11: Give finishing touches

To make the basket look prettier, add a pearl lace in the base of the basket. On the sides of the holders, apply some glue and stick the beads lace. Here is your beautiful accessories basket ready!
This is a multi-use basket which you can use for different purposes. Place your threads and needles, your accessories, hair accessories, jewelry or some random home stuff in it and make your room more neat and clean!
Try some different décor items and shades and reinvent this pretty basket! Don’t forget to share your reinventions and experiences with us!
Happy crafting!
Article Tags: Best Out Of Waste Craft Ideas · DIY Paper Basket · How To Make DIY Paper Basket · Paper Basket DIY · Recycled Craft Ideas


